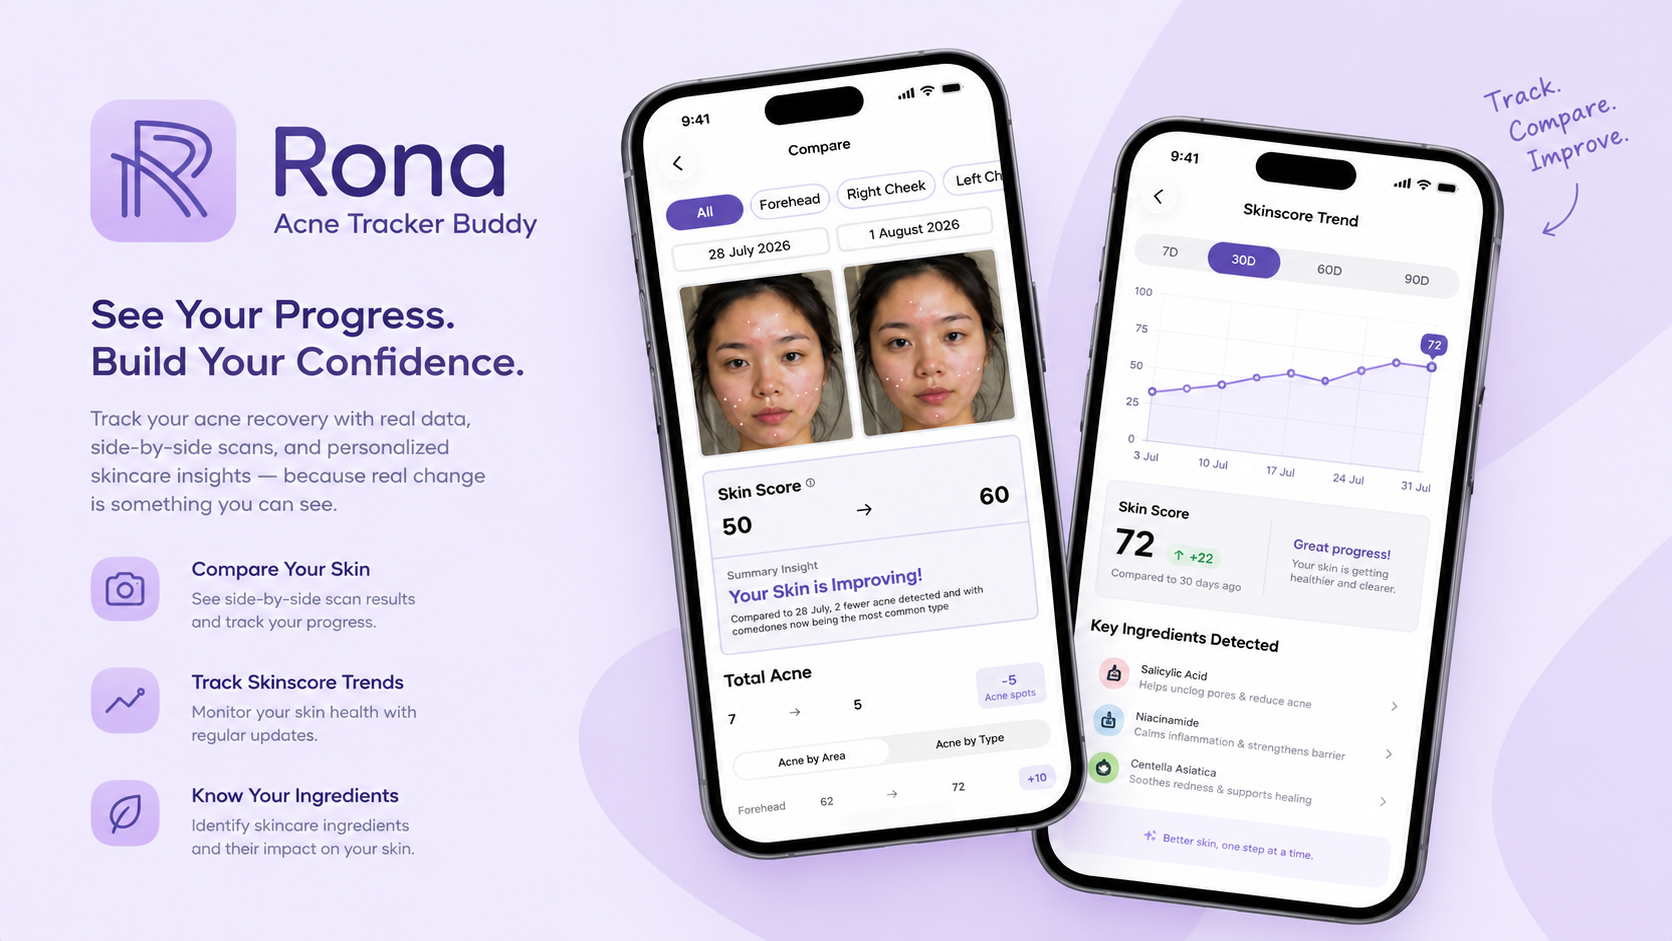
The Subjective Mirror Trap
Checking the mirror every morning is the worst way to track acne treatment. The human brain normalizes gradual daily changes, and room lighting fluctuates between morning sunlight and yellow incandescent bulbs. After three weeks of using an expensive dermatologist serum, people still end up wondering if their skin is actually improving or getting worse.
During Challenge 4 at Apple Developer Academy, our 10-person cross-functional team (internally codenamed Suzuran) set out to tackle this uncertainty.
Our guiding challenge question was:
How might we help people with skin insecurity build self-love and confidence through objective recovery tracking?
As the machine learning engineer and iOS developer on the team, my responsibility was clear: build an automated detection pipeline that identifies and counts acne lesions across three standardized face angles, while guaranteeing that sensitive close-up facial scans never leave the user’s phone.
Guided Three-Angle Face Capture
(Front, Left Cheek, Right Cheek)
               │
               ▼
   FaceGuideOverlay & Lux Sensor Check
   (Ensures consistent alignment & lighting)
               │
               ▼
      The Privacy Dilemma
   (Can we run heavy computer vision
    locally without draining battery?)
               │
               ▼
   YOLO26s CoreML INT8 Model (9.3 MB)
   ├── Embedded on-device NMS
   └── Apple Neural Engine (ANE) Inference
               │
               ▼
  6 Clinical Acne Classes Localized
  (Papule, Pustule, Blackhead, Nodule, Cyst, Whitehead)
               │
               ▼
  Historical Side-by-Side Comparison Slider
The Privacy and Latency Constraint
Early in user research, participants made one requirement unmistakable: nobody wants their unedited, high-resolution acne photos uploaded to third-party cloud servers. A single data leak of close-up medical selfies would destroy user trust.
That eliminated cloud APIs immediately. Everything had to run offline.
However, running computer vision on an iPhone presents steep hardware constraints. A standard unquantized object detection model can easily take 40 megabytes of storage, create noticeable thermal throttling, and cause several seconds of inference latency between scan angles.
Could we compress a full clinical object detection model into under 10 megabytes without losing small inflammatory lesions?
Dataset Curation Across Six Clinical Classes
To detect acne objectively, we curated a dataset of 14,630 clinical images containing 101,730 annotated bounding boxes categorized across six clinical acne types:
| Acne Class | Annotations | Clinical Description |
|---|---|---|
| Papule | 39,833 | Small, inflamed red bumps |
| Pustule | 27,168 | Inflamed bumps containing visible pus |
| Blackhead | 17,023 | Open comedones with dark oxidized surfaces |
| Nodule | 11,363 | Deep, painful, solid tissue lesions |
| Cyst | 4,840 | Deep, pus-filled severe lesions |
| Whitehead | 1,503 | Closed comedones covered by thin epidermis |
The distribution had severe class imbalance: papules accounted for nearly 39% of all annotations, while whiteheads represented just 1.5%.
During model training with PyTorch and Ultralytics YOLO26s (9.95 million parameters, 22.8 GFLOPs), I tuned focal loss parameters and IoU assignment thresholds. This prevented the dominant papule and pustule classes from drowning out learning gradients for rarer, high-severity lesions like cysts and nodules.
Compressing to 9.3 MB with CoreML Quantization
After achieving stable training convergence in PyTorch, the next hurdle was on-device deployment.
Exporting directly yielded a 38 MB model file, which was too heavy for rapid background inference during multi-angle captures.
I built an export pipeline that embedded Non-Maximum Suppression (NMS) directly into the CoreML computation graph and applied post-training INT8 weight quantization:
# Exporting PyTorch model with embedded NMS and INT8 quantization
from ultralytics import YOLO

model = YOLO("best_yolo26s.pt")
model.export(
    format="coreml",
    nms=True,
    int8=True,
    imgsz=640
)
Quantization slashed the model footprint down to 9.3 MB.
Because the computation graph was optimized for the Apple Neural Engine (ANE), inference across a 640x640 frame completes in under 35 milliseconds, allowing immediate feedback as the user transitions between front and profile facial angles.
Evaluation Results and Honest Trade-offs
On our holdout test set of 1,372 clinical images (7,370 annotated instances), the quantized on-device model delivered solid screening metrics:
| Metric | Holdout Score |
|---|---|
| Overall Precision | 71.86% |
| Overall Recall | 64.29% |
| mAP50 | 67.21% |
| mAP50-95 | 38.09% |
Looking into individual lesion classes revealed realistic computer vision limitations:
Per-Class Recall Performance:
Cyst:       76.28%  ███████████████▌ (High severity, strong detection)
Whitehead:  71.77%  ██████████████▍
Papule:     65.73%  █████████████▏
Pustule:    64.77%  █████████████
Blackhead:  57.91%  ███████████▌
Nodule:     49.27%  █████████▉       (Sub-surface, hardest to detect)
Cyst recall reached 76.28%, which was a priority for our team because cysts represent severe inflammation where tracking recovery is most urgent.
Conversely, nodule recall was our lowest at 49.27%. Unlike pustules or whiteheads that create distinctive surface textures, nodules develop deep under the dermis without sharp boundaries, making them difficult to separate from surrounding redness in standard 2D RGB photos. Acknowledging this limitation helped our UX designers communicate honest scan expectations rather than claiming flawless diagnostic accuracy.
How do we ensure side-by-side scans look comparable when users photograph their skin weeks apart?
Guided Three-Angle Capture and Lighting Verification
A great machine learning model is useless if day 1 is photographed in bright outdoor sunlight and day 20 is captured in dim indoor lighting.
To solve this, I helped build FaceGuideOverlayView.swift and LightingIndicatorView.swift in SwiftUI.
final class FaceScanViewModel: ObservableObject {
    @Published var currentPhase: FaceScanPhase = .front
    @Published var isLightingValid: Bool = false
    @Published var faceAlignmentScore: Float = 0.0

    func evaluateFrame(luxValue: Float, faceBounds: CGRect) {
        // Enforce minimal ambient brightness to avoid shadowy false positives
        isLightingValid = luxValue >= 120.0

        // Ensure face fits within the target oval boundary
        faceAlignmentScore = calculateCentering(faceBounds)
    }
}
The camera interface draws dynamic alignment guides, instructing the user to center their face and turn precisely for left and right cheek profiles. It also reads ambient lux sensors, refusing to snap the photo until ambient lighting is bright and even.
Standardizing distance, angle, and illumination is what makes the historical comparison slider meaningful: users can slide between week 1 and week 4 and see real pigment changes rather than lighting artifacts.
What I Learned
RONA was the largest cross-functional engineering project of my time at Apple Developer Academy. Collaborating across a 10-person team of researchers, designers, and developers taught me that machine learning is only one part of the user experience.
Optimizing YOLO26s down to 9.3 MB was technically rewarding, but the design decisions around it, such as camera guidance overlays, lighting validation, and explaining class recall honestly, were what made the application usable for people dealing with real skin insecurity.